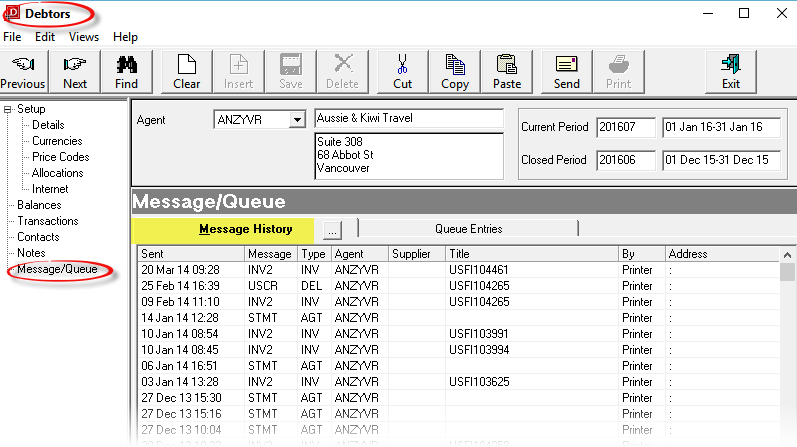
The Message/Queues node provides details of messages sent to the agent and internal queue messages regarding the agent. Messages which are sent from bookings to the agent as well as messages sent from this agent screen display here.
In addition a general message can be sent to the agent from any node in the debtors application.
There are some rules which apply that determine which, if any, messages and queue entries display:
Queue entries flagged as deleted are not physically deleted, and they display in this list flagged D
Full detail on setting up queues and messages are in the System Setup Training Guide.
Screen Shot 82: Message History Screen


|
The column headings at the top of these scrolls are the default headings for this screen. A full list of column headings available in this scroll is under Message History in the Scroll Column Headings section. |
Messages which display in this screen can be filtered by clicking the Search button ( ) on the Message History tab.
Screen Shot 83: Filter Messages Dialogue
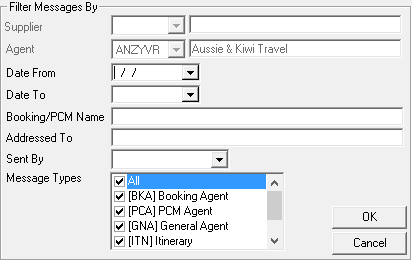
Supplier (Drop-down)
This field is not enabled.
Agent (Drop-down, Display Only)
Defaults to the current agent and cannot be changed.
Date From (Date)
Display only messages after the date specified.
Date To (Date)
Display only messages prior to the specified date.
Booking/PCM Name (60 Characters)
Only agent messages relating to the specified booking or PCM name.
Addressed To 60 Characters)
Only agent messages addressed to a specific fax or email number/address.
Sent By (Drop-down)
Only agent messages sent by a specific Tourplan user name.
Message Types (Multi Select List Box)
Select messages of a specific type.

|
Note that only Agent type messages are included in this list. Supplier type messages are excluded. |
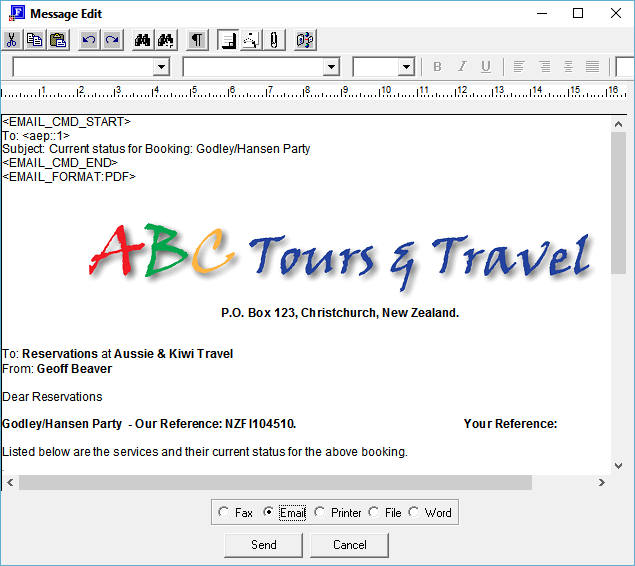
To view a message, double click the line.

|
The message contents can only be viewed if full or text history is being kept. |
Screen Shot 84: View Sent Message

|
The message being viewed cannot be edited or altered in anyway. Provided the history type allows, it can be re-sent. Messages which do not allow re-send (see Message History Types) will display only a Cancel button. |
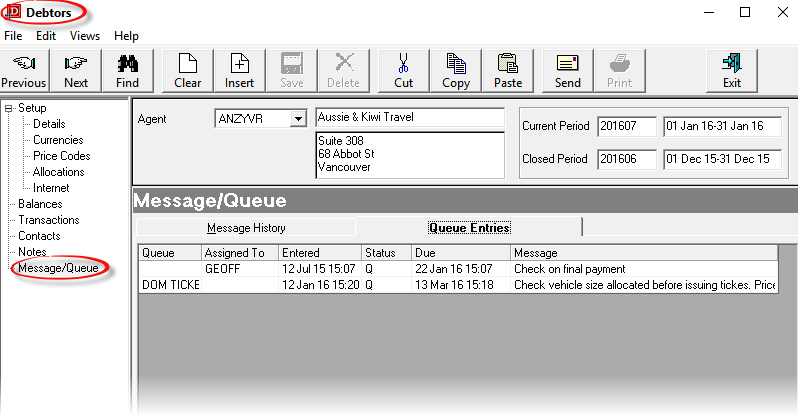
Queues provide a means of sending messages internally amongst Tourplan users or groups of users on the local network. These permit workflow based reminders to be queued for some future action, as well as being used for general reminders or office communication. They are context sensitive and can be attached to a booking, PCM, agent and/or supplier and therefore be viewed from a number of areas within the system.
Queue messages can be viewed or sent from this screen.
Full details on setting up and using queues are in the System Setup Training Guide.
Screen Shot 85: Queue Entries Screen

|
The column headings at the top of these scrolls are the default headings for this screen. A full list of column headings available in this scroll is under Scroll Column Headings, Queue Entries. |
A General (non-booking specific) message can be sent from the Debtors application to a debtor/agent. A General Agent message format simply holds addressing information and allows a message to be typed and sent to the debtor.
To send a message, select the debtor/agent that message is to be sent to and then click the Send button  in the button bar. The message selection dialogue will display.
Screen Shot 86: Message Selection Dialogue
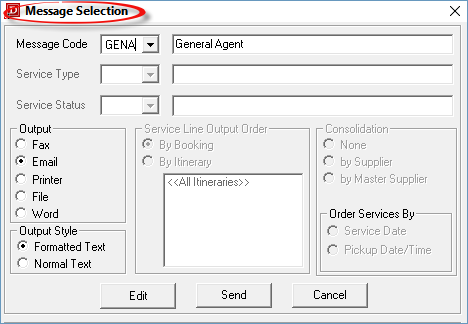
Message Code (Drop-down)
A list of available, valid message types will display in the drop-down.

|
Only message formats that have been set up as a General Agent message type will be available for selection. These formats must first be set up in the System Messaging application. |
Output (radio button)
The output method set by the System INI setting MS_DEFAULT_SEND_MODE will determine which of the radio buttons is checked. The output mode can be changed here, or in the message editing screen. The valid output options are:
Output Style (radio button)
The default is Formatted Text. This means that the message will be output in RTF (Rich Text Format) which includes graphics (if embedded in the document). Normal Text is designed to be used with Dot Matrix style printers which do not offer graphics support.
All other output options are disabled, since they can only be used with messages being output from within a booking.
Edit/Send/Cancel (Buttons)
When the Edit button is clicked, the message editor window opens.
Screen Shot 87: General Agent Message Editing Screen
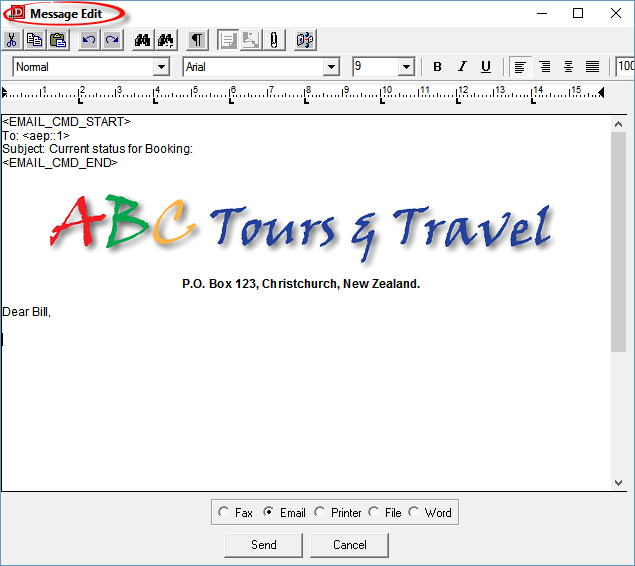
Because General Agent message formats are designed to allow free format editing, the Message Edit screen is generally blank except for the fax and email addressing detail.

|
The addressing detail should not be edited or removed. Any changes to them could make message sending invalid. If the message is to be sent to printer or file, these commands will be stripped out prior to output, provided MSG_IGNORE_FAX_EMAIL_NOS has been set. |
When the message has been entered, the output method can be changed if necessary. Depending on the output method, differing dialogues will display when the Send button  is clicked. Phone/fax numbers are substituted at this time and dependent on phone book set up and content, confirmation or selection of a phone or fax number may be required if there are multiple contacts set up for the debtor.
|
|
Only message formats that have been set up as a General Agent message type will be available for selection. These formats must first be set up in the System Messaging application. |
Fax (Radio Button)
Tourplan will deliver the message to the folder nominated in the System INI setting MS_FAX_OUTPUT. This should be a folder being polled by Tourplan compliant fax software (if installed).
Email (Radio Button)
Tourplan will call the Windows MAPI spooler and deliver the message to the MAPI compliant email client. Note in Screen Shot 87 General Agent Message Editing Screen, an additional button becomes live when Email is selected as the output method.
Click the paperclip icon (highlighted yellow below) to open a window displaying files already attached to the message.
Screen Shot 88: Email Message Output – Attach Document Button
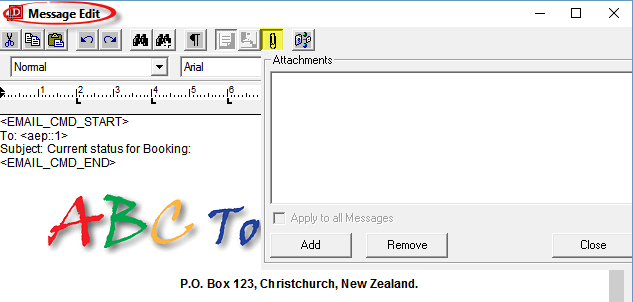
From this window, the Add Button  opens the standard Windows Find Attachment dialogue.
To remove an already attached file, highlight the file to be removed and click the Remove button  .
.
When finished with attachments, click the Close button  .
.
Printer (radio button)
The standard Windows printer selection dialogue displays enabling a printer to be selected. Any system required addressing detail (see Screen Shot 87 General Agent Message Editing Screen) is stripped out before printing provided the System INI setting MSG_IGNORE_FAX_EMAIL_NOS is set to Y
File (radio button)
The message can be output to a disk file in Plain Text (.txt), Rich Text (Word processor format–RTF) or Portable Document Format (PDF). The output to Word is enabled if the INI setting for External Editing is enabled and the path to the specific Tourplan document template is valid.