(continued from Bank Reconciliation)
The Bank Reconciliation set up requires:
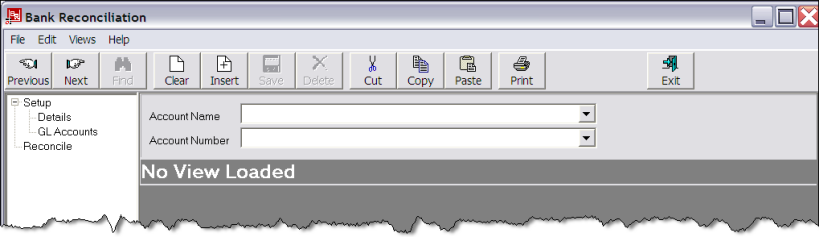
Screen Shot 37: Bank Reconciliation–Opening Screen

Insert
To enter the physical bank account details, click the Insert button in the button bar.
Screen Shot 38: Add New Bank Account Wizard
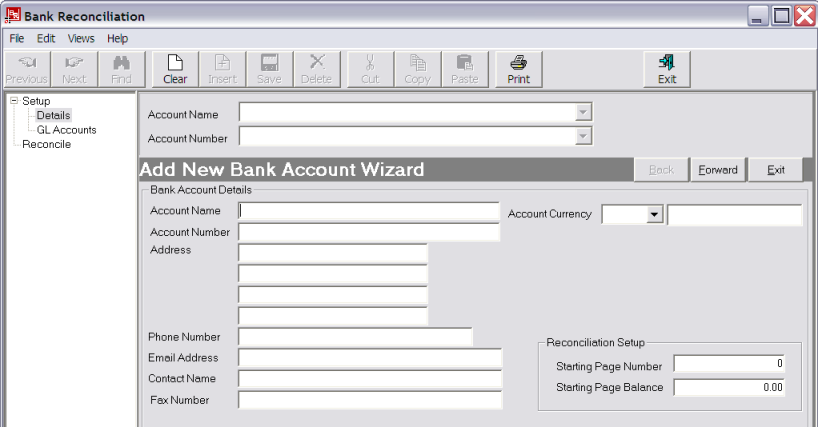
Account Name (60 Chars, Mandatory field)
The name of the physical bank account. This field can be used to select the bank account during the reconciliation or banking processes.
Account Number (60 Chars, Mandatory field)
The number of the physical bank account. This field can be used to select the bank account during the reconciliation or banking processes.
Address and Contact Details
These fields are optional and are for information only.
Account Currency (Drop-down)
Select the currency for this bank account.
|
|
This is the currency of the physical bank statement for the bank account. |
When a currency has been selected, the available transaction currencies will display.
Transaction Currency (Multi Select List Box)
The transaction currencies that can be posted to this bank account.
|
|
The currencies that are checked here do not have to match the currencies which are attached to the GL account(s) that this bank account applies to. For example, the GL account may only have base currency (NZD in this example) attached, but transactions in other currencies may be created which will post to this GL account—e.g., a debtors receipt in USD which will be converted to NZD when posted to the GL. If USD is not checked in the Bank Reconciliation Transaction Currency list, then it will not display in the Bank Reconciliation. |
|
|
If the currency selected in the Account Currency field is not base currency, then the multi-list select box Transaction Currencies does not display. This is because another level of exchange rates would be required to get back to base currency and this is not possible. |
(continued in Reconciliation Setup)
 Tourplan iS V2.07 Accounts 2 Training Guide
